Trials and Tribulations of Unreal Horde (feat. Perforce, Docker)

Preface

Before starting, I will note that I am aware that Unreal Horde is being used internally at Epic Games, and currently is in an experimental stage and support is not provided. I’m hoping that this can be of use to some other sysadmins, or indie game developers to get their studio running “The Epic Way” (insert guitar rift).

Acknowledgements

I’d also like to acknowledge a few people for answering some questions about their workflow.

  1. DANNYonPC
    • I asked DANNYonPC if there was anyone he knew that could answer some internal CI/CD, Task Tracking, and other internal systems gamedev questions without breaking NDA. He referred me to GameDevMicah!
  2. GameDevMicah
    • Thanks for answering my questions and immediately pointing me to @flassari, they were one of the only people to reply to my requests.
  3. Ari Arnbjörnsson
    • The presenter, and promoter of the “Setting up an Unreal Engine Studio the Epic Way” [X/Twitter, YouTube, Epic], without there insights and overview this would never have been possible, and is the rough guide of how to do things “properly” for the best results.
  4. Developer from The Farm 51
    • Could not answer most of my questions due to NDA, but at least let me know that Jira is the industry standard for issue tracking

In order to keep things straight from a configuration area, here is my (at the time of writing) configuration for the Unreal Horde setup.

Hardware Specifications

  • Primary Virtualization Server
    • 16-Core Epyc with 128GB of RAM, Installed with Proxmox VE
  • VM1
    • Hostname: docker.example.com
    • 64GB RAM allocated
    • Ubuntu 22.04 LTS
    • Docker + Portainer Installed
  • Perforce Container
    • Hostname: p4.example.com
  • Postgres Container (From Horde Docker Compose)
    • Hostname: db.example.com
  • Redis Container (From Horde Docker Compose)
    • Hostname: redis.example.com
  • VM2
    • Hostname: winbuilds.example.com
    • 32GB RAM allocated
    • 512GB Storage
    • Windows Server 2022 Core
  • Build Server 2 (not installed yet)
    • Hostname: winbuilds2.example.com
    • 64GB RAM
    • 1TB SSD Storage
    • Windows Server 2022 Core
  • Build Server 3 (not installed yet)
    • Hostname: winbuilds3.example.com
    • 64GB RAM
    • 1TB SSD Storage
    • Windows Server 2022 Core
  • Laptop
    • Hostname: win-laptop.example.com
    • 40GB RAM
    • 2TB SSD Storage
    • Windows 10

Installing the Horde Server

This was quite frankly one of the easiest parts of installing the Horde server. I use Portainer, so I went to my admin control panel, went to registries, and added the ghcr-packages-readonly for ghcr.io on GitHub using a Read-Only packages token as the password to get access to the Epic Games Unreal Engine packages repository. Then I selected my local docker server, went to Stacks then created a new one for ue-horde. I won’t re-iterate this portion here because it is located in the Unreal Engine Horde Source Code documentation.

Issues with the Horde Server install

For whatever reason when installing the Horde Server using the docker-compose method that is suggested by Epic themselves. When you go to Download->Tools there were none available. I made note of this to the author Ari, and they mentioned:

I’m not entirely sure if this lines up with 1:1 to the expected experience. Is the GitHub package not the latest release? Did I mis-configure something, or didn’t set something up properly? I’m not entirely sure, this may be something to look into in the future. The workaround I did for getting the Horde Agent installed was to install the Horde Server on my laptop, then download the installer and manually copy it over to the build server and install it. This was the most confusing part of the install, and even building the binaries from source, I still had no reference on where to put them, what registry keys need to be set, or what configuration files needed to exist. I could just be a idiot at this step and missed something.

Installing the WinBuilds Server

I chose to use Windows Server 2022 Core, which does not contain the typical GUI interface for Windows Server. This would lead to a few roadblocks. All of these can be overcome.

Installing the software

One of the first roadblocks that I encountered was involving the Windows Server 2022 Core image and getting all of the requirements for the build server in order. Preparing the build server was done with a pre-made PowerShell script, but the relevant parts have been clipped below.

# Disable defender.
Write-Output "Disabling Windows Defender..."
dism /Online /NoRestart /Disable-Feature /FeatureName:Windows-Defender /Remove /Quiet

# Download cacerts
mkdir C:\certs
mkdir C:\certs\out
Invoke-WebRequest https://curl.se/ca/cacert.pem -OutFile C:\certs\cacert.pem

# Split CA cert bundle into individual certs.
$content = Get-Content -Path "C:\certs\cacert.pem" -Raw
$certificates = $content -split '(?<=-----END CERTIFICATE-----\s+)' -ne ''

$index = 1
foreach ($certificate in $certificates) {
    if ($certificate -match '-----BEGIN CERTIFICATE-----') {
        $title = ($certificate -split '\r?\n')[0].Trim()
        $fileName = "C:\certs\out\certificate_$index.pem"
        $certificate | Out-File -FilePath $fileName
        Write-Host "Certificate saved to: $fileName"
        $index++

        # Import the cert into the root trust store.
        try {
            $cert = Import-Certificate -FilePath $fileName -CertStoreLocation Cert:\LocalMachine\Root
            Write-Host "Successfully imported: $fileName"
        } catch {
            Write-Host "Failed to import: $fileName. Error: $_"
        }
    }
}

# Install Chocolatey
Write-Output "Installing Chocolatey..."
[System.Net.ServicePointManager]::SecurityProtocol = [System.Net.ServicePointManager]::SecurityProtocol -bor 3072
iex ((New-Object System.Net.WebClient).DownloadString('https://community.chocolatey.org/install.ps1'))

Write-Output "Configuring Chocolatey..."
choco feature enable -n allowGlobalConfirmation
choco feature enable -n useRememberedArgumentsForUpgrades

# Install packages
Write-Output "Installing packages..."
choco install -y docker-engine

# Install additional dependencies using chocolatey:
# - git
# - gzip
# - ninja
# - Node.js LTS
# - 7-Zip
# - CMake
# - Python 3
# - Visual Studio 2022 Build Tools (w/ all workloads)
# - nuget
choco install gzip ninja nodejs-lts python3 7zip
choco install cmake --installargs '"ADD_CMAKE_TO_PATH=System"'
choco install -y git.install --params '"/NoAutoCrlf /SChannel"'
choco install -y visualstudio2022buildtools
choco install -y visualstudio2022-workload-webbuildtools --package-parameters '"--includeRecommended --locale en-US"'
choco install -y visualstudio2022-workload-manageddesktopbuildtools --package-parameters '"--includeRecommended --locale en-US"'
choco install -y visualstudio2022-workload-vctools --package-parameters '"--includeRecommended --locale en-US --add Microsoft.VisualStudio.Component.VC.ATL --add Microsoft.VisualStudio.Component.VC.ATLMFC --add Microsoft.VisualStudio.Component.Windows10SDK.20348"'
choco install -y nuget.commandline
choco install -y awscli

Resolving issues with the Perforce client

Something that was not noted, but maybe I had missed is Horde requires Perforce to be installed, and the server to be rebooted before build agents will function properly. After downloading the P4 client from Perforce, the installer refused to operate properly. It would create a blank window then disappear later. This was resolved by opening up PowerShell to where the installer was located and running the installer in quiet mode which can be done via:

helix-p4-x64.exe /q

Additional Configuration

In order for p4 (the Perforce client) to function at all it requires a bit more of a setup. This can be found on Perforce’s Environment and registry variables page. You must set the system-wide/global environment variables on the build server. This can be done via PowerShell once again and requires these variables:

P4USER=<user that has access to perforce, I use ldap for this so this is the username of that user>
P4TRUST=<location of p4trust.txt file, to allow self-signed perforce certs over SSL>
P4PASSWD=<password of P4USER>
P4PORT=ssl:p4.example.com:1666 <perforce server hostname:port>
P4CLIENT=C:\x\h\b <location of where to build, should be a short path>

You should be able to test this configuration after another restart to ensure that it works properly with a “p4 info” command. I would also try listing the repositories with “p4 repos” to ensure that proper connection is established, and the p4trust.txt file is working as intended.

Now you have a fully configured Windows based build server which is a requirement for Unreal Engine 5.

Additional Notes on the Perforce Server (p4d) side

In order for the build server to work properly, the p4 account MUST have super access to the repository. I tried this with read/list permissions only, and Horde would fail to operate properly. I don’t believe this should be a requirement, but I’m not sure what p4 command Horde tries issuing that fails without this. You can check the log files in C:\ProgramData\Epic\Horde\Agent to debug issues going on. I’m hoping that Epic Games can shed some light on this in the future.

Potential Additional P4API issues on Build Server

I am not certain if this was required, but as I was attempting to debug issues on why Horde was not dealing with Perforce correctly, I was getting an C++ crash exception in Horde Agent which would crash the agent all together. It was dealing with the Interop with the P4API, so I downloaded the P4API files and copied them to the same directory as the Horde Agent (located C:\Program Files\Epic Games\Horde\Agent). I don’t believe this is required, but I was just troubleshooting.

Modifying the Horde Server address in the Agent build server

I’m not going to lie, I typo’d my server address and needed to change it for the Horde Agent that was installed on the build server. I scraped through the Horde Agent source code and found that registry key location is: Computer\HKEY_LOCAL_MACHINE\SOFTWARE\Epic Games\Horde Key: Url Value: http://horde.example.com:13340 after changing this and giving the build server another restart, it was connected properly to the server.

Final Results

Well I am not at the point of actually building anything yet, but that’s just configuration files which are well documented in the Tutorial: Setting up and Unreal Engine Studio the Epic Way video and documentation, which again we have to thank Ari so much for. You are a lifesaver in this situation and I cannot wait to see how Epic and Unreal Horde progress in the later versions. Expect a Unreal Engine 5 indie title eventually from me 🙂

General Information

Install paths are located

Registry Location: Computer\HKEY_LOCAL_MACHINE\SOFTWARE\Epic Games\Horde
Key: Url, Value: http://horde.example.com:13340

Registry Location: Computer\HKEY_LOCAL_MACHINE\SOFTWARE\Epic Games\Horde\Agent
Key: WorkingDir, Value: C:\x\h\

Horde Agent (the tool) logs
PS C:\ProgramData\Epic\Horde\Agent

Horde "run output" logs (this will be the directory set for WorkingDir in registry)
C:\x\h\

Horde .dll/exe/whatever files
C:\Program Files\Epic Games\Horde\Agent

How to Mod PayDay 3 (Game Pass/Microsoft Store) version

There were a lot of tutorials on how to mod PayDay 3 for the Epic or Steam versions. From the commentary I saw, there were a lot of people saying that the Game Pass/Microsoft Store/UWP version could not be modded. I found a bit of a workaround to allow you to mod it just the same as all of the other versions.

Finding the PayDay Directory:

Open up a new Command Prompt as Administrator (normal user won’t work) Navigate to cd <DRIVE WHERE PD3 GamePass is Installed>:\WindowsApps in my case this was D:\WindowsApps type in dir

You should get an example that looks similar to this:

10/16/2023 08:50 AM <JUNCTION> DeepSilver.39921928C90D0_1.0.8.0_x64__hmv7qcest37me

Take note of this directory name, you will need it for later Open a new File Explorer and put in the path that you found earlier in my case it was D:\WindowsApps\DeepSilver.39921928C90D0_1.0.8.0_x64__hmv7qcest37me

Creating the Mods Folder:

You should see the Engine, PAYDAY3 folder in there Navigate to Content\Paks as you normally would for Steam/Epic versions, create the ~mods folder and insert your mods like normal

Creating the Launch Shortcut:

Next go up 2 directories, and enter the Binaries\WinGDK directory, so for me this is D:\WindowsApps\DeepSilver.39921928C90D0_1.0.8.0_x64__hmv7qcest37me\PAYDAY3\Binaries\WinGDK

Right Click and drag and drop on your desktop the PAYDAY3Client-WinGDK-Shipping.exe and create a new shortcut via Create Shortcut Here

Right click on the shortcut -> Properties, at the end of the Target: path add a space and -openfilelog

Double click the shortcut and PD3 should open, this is what mine looks like for example (the dx11 flag can be ignored, I have it for preventing crashing reasons) D:\WindowsApps\DeepSilver.39921928C90D0_1.0.8.0_x64__hmv7qcest37me\PAYDAY3\Binaries\WinGDK\PAYDAY3Client-WinGDK-Shipping.exe -dx11 -fileopenlog

Enjoy 🙂

Analysis of large binaries and games in Ghidra-SRE

Ghidra is a free and open source reverse engineering suite. It is flexible with scripting and plugins and can be used for almost any architecture. If one does not exist you can add it yourself, if there’s a bug you can fix it yourself, which is the beauty unlike competitors such as IDA Pro. (Did I mention it was free as well???) I have been checking out Ghidra since the initial public release and for “real work” situations it was less than ideal. I kept watching process on the bug tracker, and noticed that 10.x had gotten many improvements and bug-fixes over the 9.x release and thought to give it a second try.

The initial results were not spectacular, running into the same Swing timeout errors (which can be solved by looking here), and overall taking 24+ hours to analyze a 300MB executable with symbols just to finally crash about about a day and half later, leaving me back at square one. This is the experience of many people that I have talked to who are into games reverse engineering where binary sizes can balloon very fast, even without symbols. I will go over the steps for PC executables that are large without symbols, but the process should be about the same for other platforms (PSX, PS2, PS3, PS4, PS5) provided you have the loaders/scripts and follow the instructions for them.

Prerequisites

Before beginning we will need a few things, first you will need to have Ghidra downloaded and extracted, at the time of writing this is version 10.0.1. Since most games are written in C++ and may have some form of RTTI (Run-Time Type Information) having a plugin to handle this is ESSENTIAL. Luckily there is, made by someone who is one of the most amazing developers that contributes to Ghidra that I have met astrelsky! His work in this area is some of the greatest I’ve seen come out of the OSS community. We will be using his plugin for the C++ Class Analyzer which handles a plethora of C++ specific things. You can download the C++ Class Analyzer on the releases section of GitHub. At the time of writing 10.0.1 is not “supported”, but it is just a very minor tweak to get it to work and will probably be updated in the future. Open the download zip file (at time of writing, ghidra_10.0_PUBLIC_20210623_Ghidra-Cpp-Class-Analyzer.zip) in your favorite archival tool (I use 7-Zip) and find the file extension.properties in the folder Ghidra-Cpp-Class-Analyzer and double click to edit it.

extension.properties file in the archive

You will need to edit the version information to say version=10.0.1 instead of the default version=10.0 save the file, and 7-zip usually will ask if you want to save to the archive, select yes.

Updated version information

Launch Ghidra and click on File -> Install Extensions click the + and select the Ghidra-Cpp-Class-Analyzer zip file.

It should be added to the list and check the checkbox to enable it and restart Ghidra.

Once Ghidra is restarted, create a new project, give it a name (I use GhidraTutorial) for this and drag an drop in your binaries. If you are loading PS1/2/3/4 ensure that the right architecture is selected. For PC binaries it usually detects correctly on the first try. In this case I am using the game Horizon Zero Dawn GOG release on PC. Allow the import to complete, but do not launch the CodeBrowser in Ghidra quite yet.

Import prompt for Horizon Zero Dawn

You will need to close Ghidra at this point because the GUI for CodeBrowser when analyzing causes nothing but issues. This is where the normal usage of Ghidra will come to a pause. We will be using the Ghidra Headless Analyzer which is a CLI tool for Analyzing or Importing files into a Ghidra database. Open up a new Terminal window (I use Powershell on Windows, Bash on Ubuntu/Linux) and navigate to the Ghidra support directory. In my case this is PS C:\Users\godiwik\Documents_tools\Ghidra\ghidra_10.0.1_PUBLIC\support .

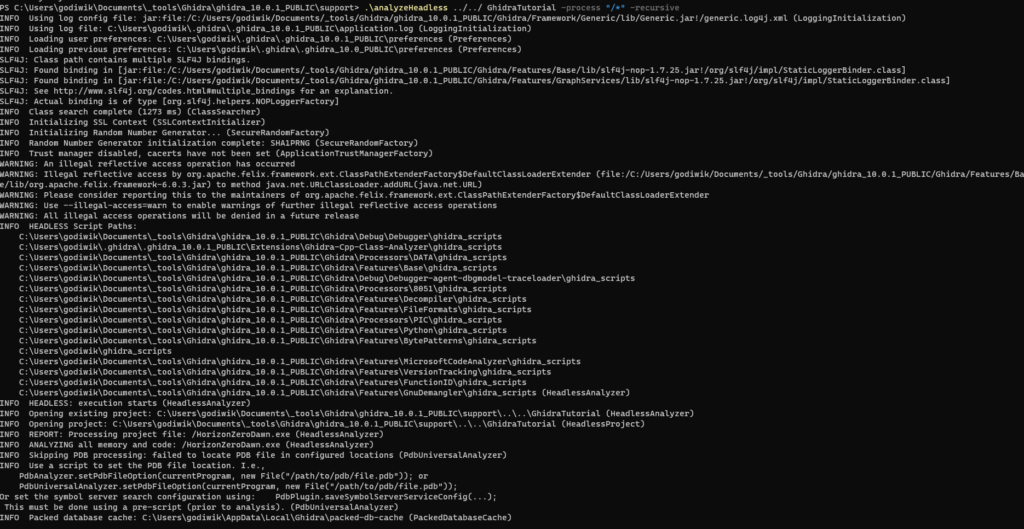
Since we have already imported the executable with the correct architecture we will just need to analyze using the -process flag. The command we will use is .\analyzeHeadless <directory to the Ghidra database> <DatabaseName> -process "*" -recursive which should handle analyzing anything we have already imported. If this does not work for you, try adding some to the wildcard such as Horizon*, or if you have it in a folder, supply the folder name with a wildcard behind.

The example that I am using is .\analyzeHeadless ../../ GhidraTutorial -process "/*" -recursive since my Ghidra database (GhidraTutorial.gpr/GhidraTutorial.rep) is one directory above the Ghidra root directory. If no errors appear, just go take a bathroom break, get some coffee, play with your favorite pet, feed your kids whatever you have to do because this will take awhile…

In process of analyzing… Waiting for completion

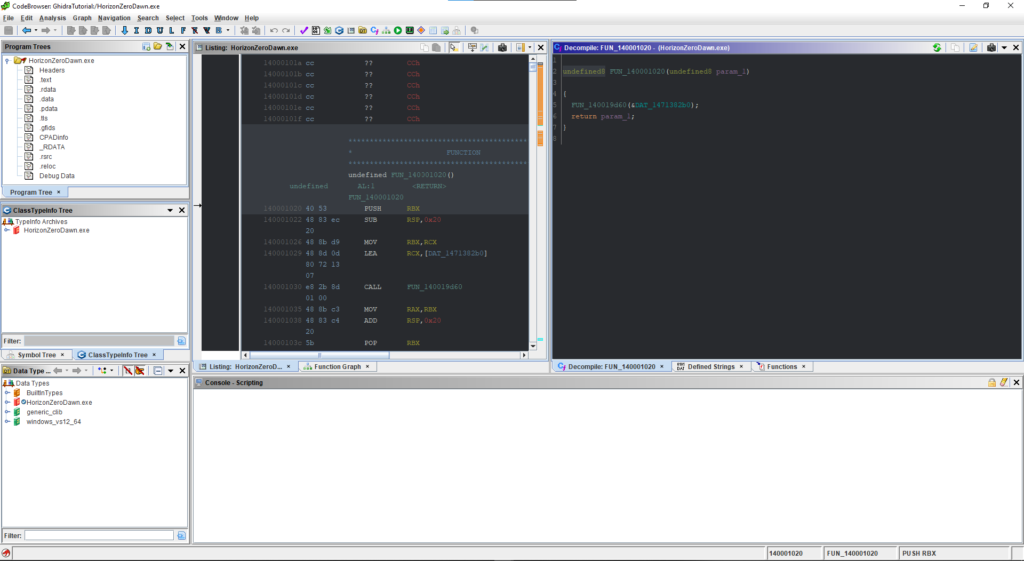
After everything is all completed, you can re-open Ghidra again. And then double click on the executable to open up the CodeBrowser.

Headless Analyzer Completed in ~30m

After this point everything should be analyzed, and the C++ Analyzer should also have been ran during the headless analyzer. If you aren’t seeing good results, then click Analysis->All Open->Deselect All->Windows (or GCC) C++ Class Analyzer (prototype), increase the Decompiler timeout from 30 seconds to 120 or 240, and click Locate Constructors then click Analyze. Wait for that to complete and everything should be ready for you to explore!

Additional C++ Class Analyzer options

All Done!

I hope that this was able to help someone, I know I was frustrated with attempting to use the GUI for large binaries, this is a workaround that is pretty awesome and you could even automate this for automatic analysis.

I’d like to thank OSM, Seremo, Shiro, krystalgamer_, Z80 in no particular order for taking interest and or helping proofread.

kiwicon – Modern Warfare Remastered Console Source

Just something I threw together in 5 minutes. Do note that a bunch of dvars have been hashed, and no longer are able to be changed by their original commands. Some work, some don’t. There is no output from the game, but you can input console commands.

Some commands that work:

  • spdevmap
  • cg_fov
  • cg_fovScale
  • jump_height
  • g_gravity
  • g_speed
  • fx_enable


kiwicon for Call of Duty: Modern Warfare Remastered SINGLEPLAYER Source Only (version 1.0.0.1 ONLY!!!!!)

Rime: November Progress Report – Preparing and Automation

It’s been a wild few months, and I would like to thank all of the testers of Rime that have been reporting bugs, suggestions and usability problems.

Rime: Operation Metro WIP

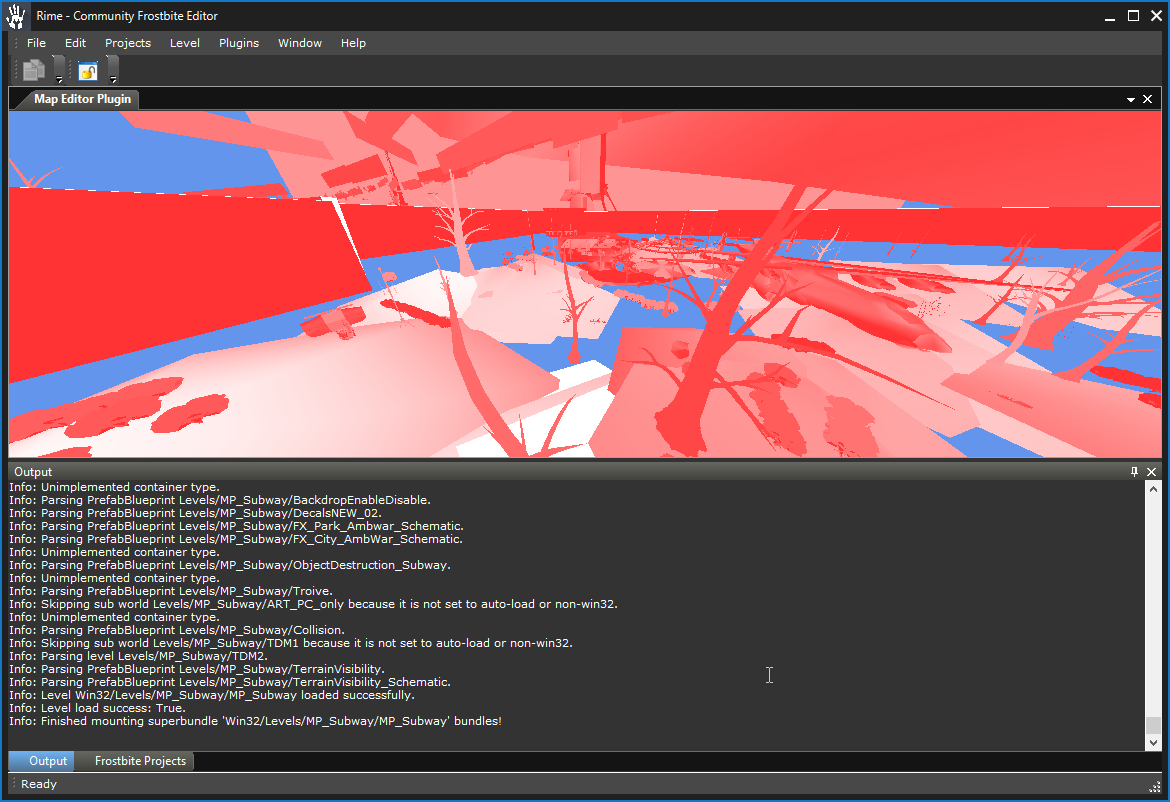
One main issue that I have with Rime is the lack of automation. It had gotten an auto-updater quite awhile back, but it was very primitive and needs an overhaul so I can push updates faster to the testers and eventually the entire community. With this documentation is key for such a complicated and large project and before hand-generating the documentation or even using a tool like DoxyGen wasn’t exactly up-to-par. I’ve spent the last few days creating DokuGen which takes the C# assemblies and XML documentation and creates a DokuWiki format output so you can just drop it in your dokuwiki/data/pages/ directory and have it reflect instantly online!

Continue reading “Rime: November Progress Report – Preparing and Automation”

Tutorial: PlayStation 4 development on Windows

If you are like me, you hate developing on Linux. Nothing beats Microsoft’s Visual Studio, nothing. Recently with the Windows 10 Anniversary update you have WSL or Windows Subsystem for Linux, as excited as I was for this to come out Visual Studio is a “slow” adopter of this technology and I currently spent many hours poking and tweaking things until I got them right. So  here it is, a full tutorial on how to get PlayStation 4 development going on Windows.

Note: This is not using any of Sony’s official software development kit, and is free for anyone to use.

Continue reading “Tutorial: PlayStation 4 development on Windows”

Rime: June Progress Report

3 Months Later, much progress has been made. Here is another dump of the git repository change-log. I won’t be able to continue development on Rime until after July due to myself switching apartments again (I move every year =[ ). With that being said, I have set up a Continuous Integration server for Rime so current alpha testers can get bleeding edge builds if needed. There’s only one problem, deploying the builds 😛 I will be writing an open source deployment tool that I will upload on my github when it is completed.

With that being said, I have a software recommendation, If you haven’t heard PVS-Studio is a hell of a tool catching many programmer errors and mistakes. Rime didn’t suffer from many errors, only 1 high level issue, ~40 medium (mostly serialization issues), and 200 low priority ones (caused by floating point arithmetic) Read more to see full change-log.

Continue reading “Rime: June Progress Report”

Rime: March Update Report

Good news, Rime is becoming more and more functional every day that it gets worked on (busy with school primarily). The last month has been both productive and a ton of work has gone into the project. Here are some of the changes from the git history.

Implementations:

  • Implemented “-cleanup” option for the auto-updater in order to clean up old files on next launch.

Additions:

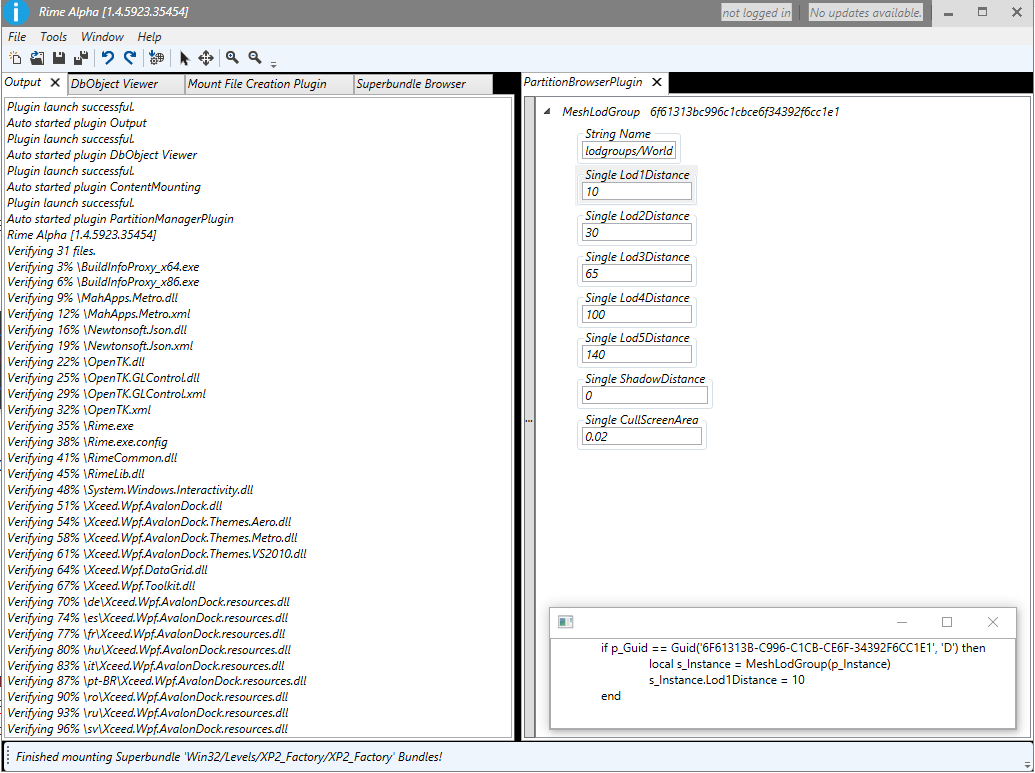
  • Added more editing abilities to the PartitionBrowserControl.
  • Added logging of version on startup (the UI is currently broken and doesn’t show it)
  • Added “Dashes” member to GUID in order to get the dashes format as well.
  • Added checking of instances on CtrRef ToString in order to show “*null*” if the partition or instance is null. (may change to partition only)
  • Also made it where if you double click on an CtrRef it will automatically open up a new editor with that instance loaded.

Bug Fixes:

  • Fixed bug with the PluginManager in where multiple instances would be removed due to old-style name checks. This was resolved by properly removing that one instance.
  • Fixed crash in the OutputPlugin due to the parameters being null.
  • Fixed threading related crash on updating the UI when a new update was made available.
  • Fixed crash in the logger when parameters were null.

Changes and Corrections:

  • Corrected List DataTemplate, by changing the member type from TreeView to ItemsControl.
  • Refactored update system.
  • Major refactoring to allow plugins to load properly. Also disabled the Theme in order to properly see what is going on in the ebx editor.

Thanks to all of the testers we have, and special shoutouts to Powback for assisting with the documentation and preparation for the public build.

For usage with VeniceEXT

Rime: January Progress Report

Time flies, I really thought I wrote the last entry last month, but apparently its been quite awhile. Here’s a bit of a status update…

I’ve been swamped with work and fixing issues and researching more cool things for Venice Unleashed. So work on Rime has been slow, but after reading the last blog post, there has been a ton of work behind the scenes that have been done with Rime.

  • Converted quite a few parts to use the MVVM for raw speed and performance
  • Added chunk reading via the VFS
  • Implemented a “new” ebx reader written by NoFaTe almost 3 years ago (+- a year)
  • Corrected issues with said EBX reader
  • Implemented ebx VFS and cross-ebx reading
  • Ebx reading and parsing is all async and threaded now and done in the background without affecting initial map loading times. (Maxed out my laptops i5 for ~9s before finishing)
  • Updated all projects to Visual C++ 14.0 and .NET 4.6.1 (fixes all UI issues using C# 6.0)
  • The bundle browser is now sorted alphabetically
  • Updated bundle browser plugin to use the VFS instead of manually parsing bundles itself.

And many many more changes to increase performance etc.